Here, I share a step-by-step guide on how I managed to get my visas approved with minimal hassle.
I’ll keep this blog updated and put as much information as I can to help you out Filipino frens! ◡̈
Japan Visa Application Using a Travel Agency — Online!
I came across Universal Holidays, Inc. when I was searching for an agency to have my Japan visa processed. I messaged them on Messenger and also sent an email to inquire. The process was smooth and I didn’t have to go to their office to submit the documents required. Everything was done via email, it’s pretty quick and easy.
Here’s what I did:
- Send an email to japanvisa@universalholidays.com to inquire about the application. They will ask your purpose for traveling to Japan.
- Wait for their reply with the fees and documents required. I paid P1,500 for a multiple entry visa. If you try to inquire via Messenger, they will also send the list of documents you need to comply with.

- Read the requirements carefully and follow the agency’s instructions for pre-assessment. For pre-assessment, you need to submit digital copies of the requirements. The agency is clear on the step-by-step process of how you can send the documents. It’s all in the email.
- Pay the visa fee so the agency can start with the pre-assessment. I paid mine via Paymaya and added P200 for the shipping fee (this is for when they mail your passport back after the application).
- Wait for the pre-assessment result and follow the agency’s instructions if there are other documents to prepare or submit. Make sure to print the application form and multi-entry request.
- Once everything is ready, you can book a Grab/Lalamove to deliver the physical documents (all must be original, including your passport) to the agency’s office in Makati.
- Wait for the agency’s receipt confirmation. Then, wait for the result.
I submitted the documents on Feb 3 and received a notification that my passport was ready for collection on Feb 7. It was just 4 days of waiting.
After you receive the notification, the agency will mail your passport back with your approved/rejected visa. I received my passport on Feb 13.
Take note that you will only know whether your visa is approved or not once you see it stamped on your passport. The agency will not email you the result. It’s worth the wait as I’ve got my 5-year multiple entry visa.

Japan Visa Requirements for Self-Employed Filipinos
It’s also worth jotting down the requirements when you submit your application with this agency. The documents you need to submit might change depending on whether you are employed or self-employed.
Here’s a list of what I have prepared and submitted:
Main requirements:
1) Passport
2) Visa Application Form
3) Photo — passport size, white background
4) PSA Birth Certificate (Original)
5) Personal Bank Certificate (Issued within 6 months)
6) Photocopy of Income Tax Return Form 1701 (w/ DTI & Form 2303)
7) Daily Schedule in Japan
8) Request Form for Multiple-Entry Visa
Others:
1) Courier Service Request Form (To be provided by the agency)
Additional reminders:
- All documents must be original — photocopies are discouraged unless stated
- Paste the photo on the application form.
- Do not staple documents
- Do not include passport jacket
- The Japan Embassy does not return any documents except passport/s
- Please make sure all downloadable forms are in a4 size.
- Processing time will take longer than usual due to the volume of applications that the embassy is currently receiving.
DIY Australian Visa Application — Online + Biometrics in VFS Global Makati
Planning to go to Sydney, Melbourne, Perth, or the Gold Coast? Then you need an Australian visa first!
I got an approved visa on my second application, which was two months after I applied the first time and got rejected. I learned my lesson of submitting as many documents as I could to prove my economic ties with the Philippines.
Here’s a simple guide to get you through the process:
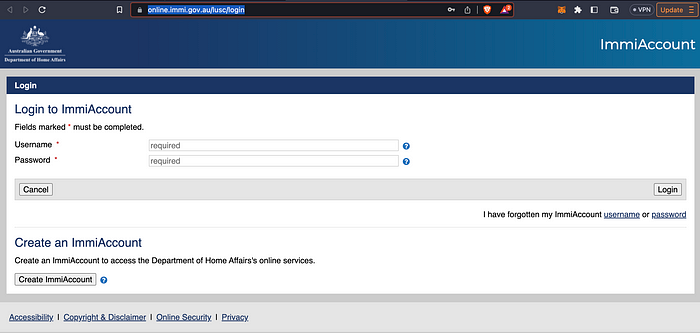
- Go to https://online.immi.gov.au/lusc/login and create an ImmiAccount. Whether you get approved or not the first time, you will use the same login to access your account in the future. Better save your username and password!
- On the “My applications” page, click “New Application.”
- On the next page, click on which type of visa you want to apply for. I applied for a Visitor Visa (600) since I am only visiting Australia for leisure.
- The next page you will see is the “Terms and Conditions” page. You need to accept before you can proceed to the next steps.
- Then, the application context. You will need to provide the following information: current location, purpose of stay, passport details, national identity card details, place of birth, relationship status, citizenship, history of travel to Australia, travel companions, residence, contact number, email, and other necessary information. Just fill them out honestly.
- Submit your supporting documents. This is where the application gets tricky. You need to provide as many supporting documents as possible to get a high chance of approval. Below is the list of documents I’ve submitted (some of them I did not submit the first time, which I believed was reason for the rejection of my application).
- Pay the application fee. I paid AUD150.
- Once submitted, you will receive an email instructing you to schedule your biometrics via VFS Global located at at Mezzanine Floor, Ecoplaza Building, 2305 Chino Roces Avenue Extension Makati City, Manila, Philippines. Note that you need to pay another P900+ as a processing fee.
Australian Visa Required Documents for Self-Employed Filipinos
Main requirements:
- Financial status and funding for visit— Q1 Percentage Tax form, ITR 2022, bank certificate (1st bank), bank statements for 3 months (second bank), vehicle deed of sale/title, insurance docs, and property deed of sale/title.
- Current employment/self-employment — DTI of my 1st and 2nd businesses, business registration form from BIR, Q1 Percentage Tax form, ITR 2022, a photo of my business account passbook, and a photo of my business account cheques.
- Travel documents — passport, UMID, and driver’s license.
- Applicant’s previous travel — a photo of all the stamps on my passport + my visa documentation (photos and approvals via email).
- Family register and composition form — I submitted my daughter’s birth certificate.
Additional reminders:
These are the things I did differently during my second application, which added to my approval rate.
- If you have one or more cars/properties/insurance, submit each document proving you own each of them. Be a little patient when uploading them!
- If you have a kid, submit his/her birth certificate. This is strong proof that you will go back to the Philippines after your trip.
- Submit your most recent tax payment proof as evidence of your existing business. Take note that they also assess whether you are earning enough to fund your travel.
- If you have more than one bank account, submit your bank certificates and bank statements from these banks.
- You can always email the embassy for any concerns regarding your application (immigration.manila@dfat.gov.au). They provide a guide on every application question in case you find them vague. Just click the small (?) icon you see in your ImmiAccount and read carefully.
- When submitting your information, make sure you submit also the information of your family members who are currently living in the Philippines (i.e.: your brothers, sisters, or other relatives). This is under “Non-accompanying member of the family unit.”
- All of these are submitted online, which means they should be digital copies of your documents. No need to mail them to the embassy.
- Every time you apply for your visa, you need to do the biometrics. As for me, I did the biometrics twice.
- Be as honest as possible!
I hope the information helps, friends! Happy to share my experience to help you prepare for your upcoming international trips.
You can read Part 2 of this article here on how to apply for a US and Schengen Visa!
Happy traveling 🫰
Larissa x
Follow me on my socials! Instagram: @larissadmg_
